
.

|
||||||
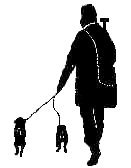
Owning a working terrier without allowing it to work is like owning a vintage bottle of wine so you can read the label. Despite the fact that there are millions of terriers in the U.S., it is rare to find a owner that actually hunts his or her dog above or below ground. While rats are plentiful in both urban and rural areas, hunting vermin-infested alleys, wharves and barns at night is not everyone's cup of tea. As for the preferred quarry of the American working terrier enthusiast -- the groundhog or woodchuck -- they are not common in the West and their small size generally requires a dog with a chest span of 14 inches or less. Since most show terriers have chests several or even many inches larger than this, hunting groundhogs with all but the smallest dog requires a great deal of digging. The good news is that, in typical American fashion, a synthetic hunting experience with wooden tunnels and caged rats has been fashioned.
What follows are five tips for tunnel training terriers. My goal is to be brief and to cover the basics for the novice. For those interested in a more detailed (and certainly more authoritative!) set of instructions, tips, and general information, I strongly recommend "Earthdog Ins & Outs: Guiding Natural Instincts for Success in Earthdog Tests and Den Trials" by Jo Ann Frier-Murza. The book is available directly from the author >> click here. 1) Starting your terrier. Terriers mature at different ages. A Border Terrier's earthdog sense does not seem to fully ripen until the dog is well past one year old, for example, while a Jack Russell may be ready to dive down a go-to-ground tunnel at 9 months of age or younger. Does this mean you have nothing to do during that first six months or a year of your terrier's life? Absolutely not. Before your dog begins formal go-to-ground training, it should know basic commands such as sit, heel, down, come, and stay. While these commands are not directly relevant to qualifying in an earthdog trial, they begin the two-way communication that is vital to having control of your dog in any trial situation. Once basic obedience commands are mastered, you can start your dog on the purely instructional level of earthdog training – steps 2 and 3 below. 2) Short tunnel construction and training. Despite what some would have you believe, earthdogs are made, not born. With practice, any dog of suitable size can be trained to go through a go-to-ground tunnel regardless of whether there is a rat at the other end or not. The place to start is with a short wooden tunnel, 6-feet in length. I like the 6-foot length because it can be stood on end inside a garage or basement – an important consideration if you do not have a large yard or house. In addition, a six-foot tunnel means the remaining 2 feet of your plywood sheet can be used to fabricate "L" corners for use in the next stage of the training process. More on that latter. For guidance on building your tunnel, see the excellent Dirt-Dog site maintained by Kirk Dickinson. >> For more information While many people recommend building tunnels out of solid lumber, I made my own (unburied) tunnels out of several sheets of 5/8-inch plywood. These tunnels have been kept outside for three years, painted and stacked but otherwise uncovered, without any serious ill effects. I strongly recommend using drywall screws for tunnel assembly, along with wooden bracing strips along the bottom to keep the tunnels square. The inside dimensions of your completed tunnels should be no larger than 9 inches by 9 inches. This is a HUGE tunnel by real earthwork standards, and your terrier will have no problem negotiating it. If you are a little lazy and want to ease construction, you can rip all your plywood into 9-inch widths and assemble a completed tunnel that is 9 inches tall but just 8 inches wide. My 15-inch dog has no problems negotiating this tunnel, and neither will your dog. There is no reason to bury your training tunnels now or in the future. A buried tunnel is nearly impossible to rearrange later on when you want to train your dog to problem-solve. And, as I will point out later, there’s an easy way to temporarily bury your tunnel as part of your normal gardening regime. OK, you've built your first 6-foot tunnel section. Now what? Simple: Don't feed your dog for one day. He'll be fine (trust me!), but he will also be VERY motivated when tunnel work begins. A motivated dog learns very quickly. Place your newly constructed tunnel outside on a hard surface (a driveway or patio is perfect) with a few scraps of wood under the tunnel to allow light to filter in along the bottom. Measure out half the kibble you will feed your dog that day, and put it in your pocket. Take out a single piece of kibble and, while the dog is watching, throw it a foot or so down the tunnel and wait. The dog should tentatively stick his head in the tunnel and grab the food. Keep repeating this process, until the dog goes deeper and deeper into the tunnel. If the dog goes all the way through the tunnel, give it a "jackpot" of five or six pieces of food and offer a lot of praise and belly scratching. Repeat until all the food for this session is gone. As your dog begins to "hunt the tunnel" for the small pieces of kibble you are tossing down it, begin to use a "get’em" command and a sweeping gesture of your arm as a "go down" signal. Eventually remove the wood scraps lifting up the tunnel so that now the only light in the tunnel is coming from the two open ends. In no time at all, your dog will be entering the tunnel and going all the way through based on nothing more than a hand or voice signal. Before going any further, make sure your dog has got this part of the game down cold. The way to do this is to make your dog WORK for all his food during this training period. If you practice with your dog five or ten minutes in the morning and five or ten minutes at night (no more), for a week or two, you will have a little tunnel demon in no time at all. 3) Long tunnel construction and training. Long tunnel construction is the same as short-tunnel construction, only now there are more sections, and there are corner pieces to create. Another visit to the Dirt-Dog web site is useful here. The good news is that it’s all pretty simple. Start with that 2-foot by 4-foot section of plywood left over from building your first 6-foot tunnel section. On this piece of plywood sketch out four right angle "L" shapes that are nine inches wide with extensions that are about 24 inches long on the outside edges. These four "L’s" will serve as the tops and bottoms of your two right-angle corners. Side pieces for these corner tops and bottoms should be cut and fastened with drywall screws so the corner segments have exactly the same interior and exterior dimensions as your straight-running tunnel sections. Why are corner pieces created separately from the straight den liners? Simple: by flipping a corner around, the next section of your tunnel setup can be made to go either left or right. With four or five straight tunnel sections, three corners, and a T-section (to be used later to create a false den), you can set up your den liners in a dozen different ways. Because your dog is already a pro on the short tunnel, it will have no problem negotiating a longer tunnel. Start by adding a corner piece to the exit end of your short tunnel. Once your dog is zipping through that, add a corner at the entrance end. Now extend the entrance by adding another 6-foot straight section of den liner piece to one of the corners, and continue to build in this fashion. Tunnel sections can be left to abut each other or, if you prefer, they can be fastened together at the top by a wooden cleat held in place with two short drywall screws. Make sure the screws do not penetrate into the tunnel interior. If you work your dog when it is very hungry and reward it with small pieces of food and lots of praise, you will have a "den demon" in no time. Notice that up to now you have used no quarry at all. Your dog is entering the tunnel and negotiating this dark maze because is has been trained to do so with simple operant conditioning (food and praise). 4) Using quarry. If your terrier is very young and already running the tunnels like a pro, then you're well on your way. Put away the tunnels now and bring them out only once a month or so -- you don't want the dog to get bored with the game. If you try to progress to the next stage – introduction to quarry – with a very young dog, very little will come of it. Your dog’s instinctive "code" is not yet "on line." This is an important point: while getting a dog to run a tunnel is largely learned behavior, a dog’s reaction to quarry is largely instinctive and age-dependent. If your terrier is under two years old, do not be discouraged if it seems timid, tentative or indifferent to quarry. In time (and with a little training) this will almost certainly change. What kind of quarry to use? Any rodent will do, but in practice most people use the lab rats that are sold at pet stores as "feeders" for snakes. I myself use squirrels that I catch in the yard with a Havahart trap and which I later let go. Why do I use squirrels instead of rats? First and foremost is the fact that divorce is expensive. Or, to put it another way, my wife won’t let me keep rats in the house. The second issue is that I have children. Kids will quickly turn a "quarry" rat into a charming little pet named "Scamper." Once that happens, your rat will never see the inside of a go-to-ground tunnel again. Finally, there is the fact that most lab rats are inanimate. While wild rats run, bite and jump as if their lives depend on it, lab rats that exhibit these traits are quickly culled because they are "too difficult" to work with. The result is today’s lab rat: a creature so turgid and lifeless it has all the prey qualities of a dirty sock. Squirrels,
on the other hand, actually smell like a wild
animal, make real prey movements, and are
generally larger than most lab rats. In short,
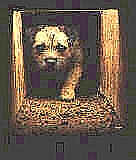
they are a nearly perfect quarry animal. n Critter Boxes Whichever quarry animal you use, I recommend NOT using the typical quarry cage used to transport rats at most go-to-ground trials. These cages are made out of welded fox wire and are not secure. Not only can rats escape from them if the doors are loose, but dogs can easily and quickly rip into them or crush them if given the slightest opportunity. I went through numerous "critter boxes" (without loss of life, I am happy to say) before I settled on my current design, which has survived everything my very aggressive Border Terrier has thrown at it. The box itself looks like an extension of the den liner, but is solid pine on five ends, and about two and a half feet long. The front of the box is made out of an expanded metal grate bought at Home Depot. The edges of this grate are trimmed in wood to prevent injury to the dog. The top of the box has a metal handle, which is used to carry the box. The quarry enters the box from the back through a solid pine door that is affixed with just two dry wall screws. With one screw removed, the door rotates around to allow the squirrel or rat to enter. Once the door is rotated back into position, a second screw secures the door shut. For those of you that decide to catch squirrels for quarry, I recommend putting out birdseed on a regular basis with a closed Havahart trap nearby. Once squirrels get used to coming to your patio or deck, it is a simple thing to bait the trap with more birdseed held in place with a dollop of peanut butter – an irresistible combination! While
lab rats are quite docile and can be grabbed by
the base of the tail and dropped directly into
the quarry box, a squirrel is a wild creature and
can bite to the bone. The good news is that
because the end of a squirrel-sized Havahart trap
is 8 inches by 8 inches, the trap’s hinged
door can be placed flush against the critter box
and the door opened to allow the squirrel to
enter the box directly. Once the squirrel enters
the critter box it will run down the length of
the box to the expanded metal grate at the other
end. The wood panel at the back of the critter
box can then be swung down, and a screw inserted,
to secure the squirrel inside. n Tunnel Bars After you have built your "critter box" you will have to modify one of your tunnel sections by adding bars and a trap door through which the dog can be removed. This is easy to do: simply make two parallel cuts, about 19 or 20 inches apart, across the top of one tunnel section, with the first cut about five inches back from the tunnel end. The section of tunnel top you have just cut out will be your trap door. Put a few drywall screws into the now loose ends of the tunnel top. Once the top is firmly reattached to the sides, affix the door with a sturdy hinge on one end, and a bolt hasp at the other. Check to make sure no sharp screw points protrude into the box. To add bars to your current set up, purchase thin aluminum bars (about the thickness of a ballpoint pen) or wooden dowels (about the diameter of a quarter) from Home Depot. The wooden dowels will have to be replaced periodically, but they will do far less damage to your dog’s teeth in the long run, and they are strongly recommended. Regardless of what type of bars you choose, the method of attachment is the same. Drill a line of evenly spaced holes of the proper bar diameter through the middle of the five-inch section of tunnel top that remains in front of the trap door. The bars should be able to slide through these holes. Now
take two identical strips of wood, at least one
inch thick and just wide enough to fit inside the
tunnel, and drill a line of evenly spaced holes
through them that exactly match the spacing of
the holes in the tunnel top. Anchor the bars into
one of these piece of wood with glue to form a
"guillotine’ of bars that can be
slipped through the end of the tunnel top. Now
take the second strip of wood with holes drilled
in it, and affix it across the bottom end of the
tunnel liner. When the guillotine bars are
slipped through the tunnel top, the bars should
slide into these holes, thereby securing the bars
at the tunnel end. n Putting It All Together I suggest not feeding your dog for 24 hours just prior to "putting it all together." By doing this, your dog will dramatically increase its motivation to do the one thing it KNOWS will generate a food response: run through the tunnel. Once you have a hungry dog, your tunnel layout is set up, and a rat or squirrel has been loaded into the critter box, you need to tie up your dog for a few minutes. The reason for this is that you need to take the fully loaded critter box and figure out where you are going to place it so that it is well out of reach of the dog but very near the blocked end of the go-to-ground tunnel. Possible critter box stash locations that have worked for me include the fork of a small tree, inside a large trashcan stationed nearby, and inside the trunk of a parked car. Look around and be creative. Once your loaded critter box is securely stashed where the dog can absolutely NOT get to it, take your dog down to the open end of your go-to-ground tunnel end and release it. Don’t be surprised if your dog dashes over to where the critter box is located. If that happens, ignore the dog. So long as the dog cannot get at the box (it must be a physical impossibility), it will soon tire. Once the dog grows winded or bored, snap on a leash and bring the dog back to the open end of the tunnel and release the dog again. Eventually your very hungry dog will go down the tunnel – the behavior you have been conditioning it to do. As soon as the dog starts down the tunnel, RACE to retrieve the critter box and place it hard against the bars at the other end of the tunnel. Why all this madness? Why not just put the rat or squirrel into the tunnel before releasing the dog? Simple: If you follow this technique, your dog will NEVER be rewarded for racing over the top of the tunnel to "get the rat" because there will NEVER be a critter at that other end of the tunnel under those conditions. GOING
OVER THE TOP OF A TUNNEL is the single most
common go-to-ground problem encountered. If you
follow the "critter box" technique
outlined here, you will start to "train
out" this problem before it ever starts. In
addition, as you will soon see, a tough critter
box is key to solving the SECOND most common
go-to-ground problem: a solid recall out of the
tunnel. nReleasing Your Dog’s Inner Beast Once your dog races down the tunnel and encounters the rat or squirrel in the critter box, it will bark, scratch, bite and otherwise try to attack the "vermin" just beyond its reach. Or maybe it won’t. A very young or inexperienced dog may not make much of ruckus, preferring instead to stare, whine or work in a very haphazard way. If that happens, don’t worry. The vermin-killing code inside your dog will eventually explode if you give it time, opportunity, experience and encouragement. Right now, though, your dog may be a little confused, unsure, or even intimidated. Open the trap door and stroke the dog on its back and offer encouraging words. Rattle the critter box a little bit. And be patient. Your dog is learning what is permitted (barking and destructive behavior) and where (inside the den liner, but not in the living room). If your terrier is over 18 months old, and he or she has been acclimated to the den liner as previously instructed, you will eventually get a dog that works well by digging, biting, yapping, and barking. But it will probably not be a one-day affair. While some part of earthdog activity is instinctive, most novices dramatically overstate this aspect and fail to formally train and work with their dogs prior to earthdog trials. The result, too often, is a long and disappointing drive back home with some lingering doubt as to the dog’s true abilities. In fact, the dog is probably fine, just undertrained and out of practice. Remember, contrary to popular mythology, great earthdogs are made, not born. 5) The pull and the recall. OK, so your dog has flown down the tunnel and created a storm of commotion at the other end. Now what? To get your dog out of the tunnel you have two options. The first option is a simple "pull" – the exit required to pass the Junior Earthdog test. This task sounds easy enough: lift up the trap door and pull the dog out. In practice, however, it can be a little more difficult. Remember, your dog may be in a VERY excited state, and the trap door may be a little shorter than your dog’s back. Practice makes perfect, but a technique that has worked well for me is to grab the dog by the scruff of the neck at one end, and the base of the tail at the other. Whatever end is loose is the one I raise first. Twisting the dog as you lift seems to make it a little easier to clear the really short trap doors you sometimes encounter. With practice, you will find "pulling" your dog is not a terribly hard chore. While a Junior Earthdog exit is fairly straightforward, most people find the Senior Earthdog exit a little more vexing. In fact, it is very easy to train provided you are consistent, practice with your dog, and have built a REALLY solid critter box. After timing your dog for a full 90-seconds of work, remove the critter box and walk back to the other end of the tunnel. Your dog should now see nothing but air through the bars. No one should be standing at this end of the tunnel, and there should be nothing to suggest that anything more will be happening at that end of the tunnel. Wait a few seconds to allow the dog to clear its head and realize what has happened, and then make ONE loud and long whistle down the tunnel shaft to call the dog back. Then do NOTHING but wait. Do not call the dog again. With no movement down at the other end of the tunnel, and no other way out, your dog will HAVE to eventually come out of the tunnel backwards. It may take your dog 15 or 20 minutes this first time, but your dog will eventually come out and when it does, your dog will get the MAXIMUM earthdog reward -- a chance to "work the critter box"!! What is "working the box"? It is nothing less than allowing your dog to throttle the critter box unimpeded by the bars at the end of the tunnel. To see a Border Terrier hell-bent for destruction is to understand why a solid-pine critter box is the only way to go. No wire cage can survive a full-throttle terrier attack. In fact, as your dog becomes more aggressive, you will need to be careful to ensure your dog does not break his teeth on the expanded metal grill at the front of the box. One way to discourage dental destruction is to attach a couple of "bite rails" on the outside of the critter box and a rope loop or two, which can be bitten and pulled. As your dog comes charging out of the tunnel to attack the box, make sure the box is turned so that the bite rails and rope pulls are at the "business end" he will reach first. Once your dog grabs the box, it will bite hard and either pull or shake the box. A fully pumped-up earthdog is intimidating. Caution should be taken that you are not accidentally bitten. Do not let your dog work the critter box for too long – it will increase the chance a tooth is broken and lessen the "prey excitement" of the game. After your dog has bitten and pulled at the box for about 10 seconds, grab the critter box handle and lift. If you’re lucky the dog will shift for a better grip, at which point you can quickly lift the box high and away from your body. Having a helper to grab the dog and put it on a leash at this point is extremely helpful. Otherwise, put the box high into the crotch of a nearby tree, on top of a car, or hanging from a tall stepladder where the dog can absolutely NOT get at it. Getting some dogs to unlock off the critter box can be a problem. One method that has worked fairly well for me is to "choke off" the dog by pouring water down its nose while the head is "locked on" in a nearly vertical position. The dog has to let go to lower its head and clear the water from its nose – at which point the box is quickly swept high and away. If all has gone well, your dog has just done something terrific: He has bolted down a long, narrow, very dark, and winding tunnel, worked a caged critter for 90 seconds, recalled on command (probably coming out backward), and then "killed" the critter box which is your proxy for bolted quarry. Your dog has just done great work! Be sure to offer enthusiastic verbal praise and feed your dog a nice "jackpot" reward of about 20 pieces of kibble. Then, after a minute of rest, repeat the whole thing. Your goal this session is get your dog to complete the entire go-to-ground experience at least three or four times in quick succession. Work with your dog every day for 10 days in order to really train in the behavior. Make sure that all your dog’s food for that day is associated with work. Keep your dog hungry and motivated and it will make fewer mistakes because it will be paying attention. This last point is critical. If you make a mistake and reward the dog for bad behavior, you will have to "untrain" your dog later on. n top banner pic byJudi Lovell |
||||||
|
||||||
 While
the "go to ground" AKC, AWTA or JRTCA
earthdog trial is not a close approximation of a
real hunting situation, it does afford the
terrier owner a chance to "explode the
code" within his or her own dog. To release
a Border, Jack Russell, Norfolk or other terrier
down a go-to-ground tunnel is to unleash more
than a dog: it is to unlock the genetic code
within and explore the dog's true reason for
being.
While
the "go to ground" AKC, AWTA or JRTCA
earthdog trial is not a close approximation of a
real hunting situation, it does afford the
terrier owner a chance to "explode the
code" within his or her own dog. To release
a Border, Jack Russell, Norfolk or other terrier
down a go-to-ground tunnel is to unleash more
than a dog: it is to unlock the genetic code
within and explore the dog's true reason for
being.