|
|
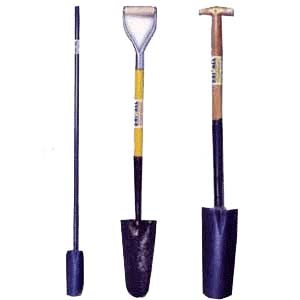
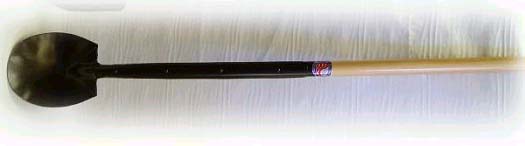
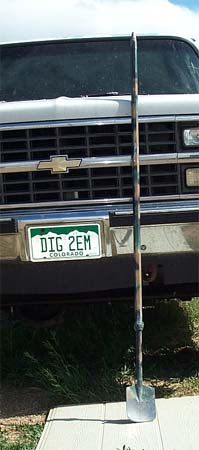
If you are going to do much digging, you need a good shovel, and at some point you will want a digging spoon as well. There are many types of shovels, but most of those sold at Home Depot are not very useful for terrier work. Square point shovels and scoops are fine for moving snow, but they cannot dig and are not needed in the field. A short-handled utility shovel might have its place in a deep dig, but it is really too light and too short to be of much use during a normal day in the field. Pictured below are four kinds of common shovels or spades, with notes on their appropriateness for terrier work.
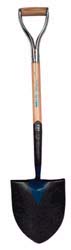
The roundpoint shown here is an Ames Pony roundpoint with turned step, and a "D" ash handle. Ames has been making American-made tools since 1774, and with this product they prove they know what they are doing. This shovel is U.S.-made, very well built, and a holds an edge well. It is a heavy shovel, weighing in at about 5 pounds -- one of the reasons I prefer it. This tool is available from AM Leonard and is worth the price in my opinion (between $50 and $60). This is NOT the cheaper Ames roundpoint you will find sold at Home Depot -- it is of much heavier construction, and is a lifetime tool for serious digging. The closest British equivalent is the Bulldog shovel, which is also a roundmouth or roundpoint shovel and priced in the same range for their better models. At the very top of the page is a very pretty "poachers spade" sold by Smith and Hawken. This shovel has a heavy blade, but it is narrow and does not move as much dirt as the Ames Pony and does not have a reinforced handle.
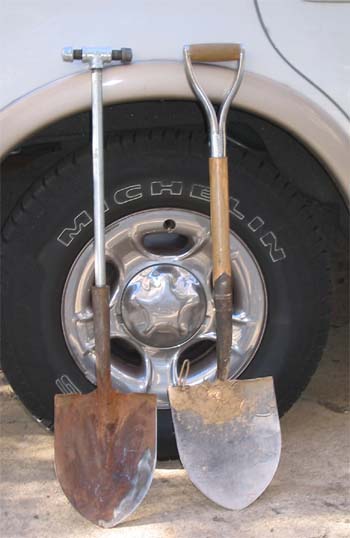
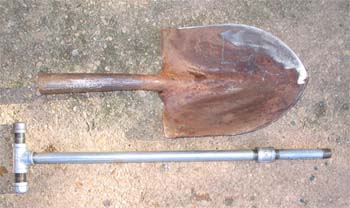
A true poachers spade is not sold in a store, of course, nor is it an actual spade. What is really required is a two-part shovel that can be stored inconspicuously in a pack but, when assembled, works as well as a regular shovel. We don't have much use for such thing in the U.S. where hunting is legal, but I have one for occasional forays at a water garden where I have permission on the back end but they want me to be as quiet and inconspicuous as possible on the front end where the customers park and congregate. Making the shovel is suprisingly simple. The new handle is made of half-inch galvanized pipe fittings from Home Depot. The shovel head is from an old long-handled shovel I had in the garage. This was a cheap stamped-metal shovel, but it works fine as the pipe handle gives it extra heft. To begin construction, I cut the old handle off the shovel, ground off the side rivet, drilled as much of the old wooden handle out of the socket as possible, and hammered what remained of the wood out of the throat with a bit of rebar driven backward up the slot.
The pipe connector and short pipe extension are screwed together and slathered with PC-7 epoxy which is the consistency of tar. PC-7 is very strong epoxy and I used this same glue for making my Bertha-spoon which has held up to a lot of abuse. The pipe connector and pipe extension are slid into the hollow throat of the shovel head (pipe connector out, pipe in), with care taken to keep the epoxy well away from the threaded hole where the pipe handle will be later be fitted. Once the pipe connector socket is fitted flush with the shovel socket, it's time to thread on the full pipe handle. Once this is done, twist the "T" handle tight so that it lines up right for digging. The handle should be twisted in very tight because you will want the handle tight when digging. Once the handle is lined up right, set the whole thing aside for at least 48 hours so that the epoxy can completely cure. Once dry, the shovel can be disassembled and the pipe threads given a shot of oil to lubricate them. A plastic sleeve cap should be fitted over the threads of the shovel handle, and a rubber cork put into the shovel head, in order to keep out dirt. Another alternative is to tape them over with the same kind of plastic tape used on a deben collar. This shovel digs fairly
well. The pipe handle gives the shovel some weight which
helps make digging easier. The pipe handle is a bit thin
and a bit cold in your hand, but it is a strong handle
and digging with it has been no problem. The Digging Spoon, Grafter or Bertha A tool that can get you out of a serious jam is a heavy spade, sometimes called a "grafter" in the UK, but more commonly called a "Bertha" or "spoon" here in the U.S. The first "spoons" were used for digging telephone poles, and consisted of lightly dished cutting blades at the end of long wooden poles. Post hole diggers and spoons (some as long as 14 feet!) were used to cut through the soil, dig the hole, and extract the dirt.
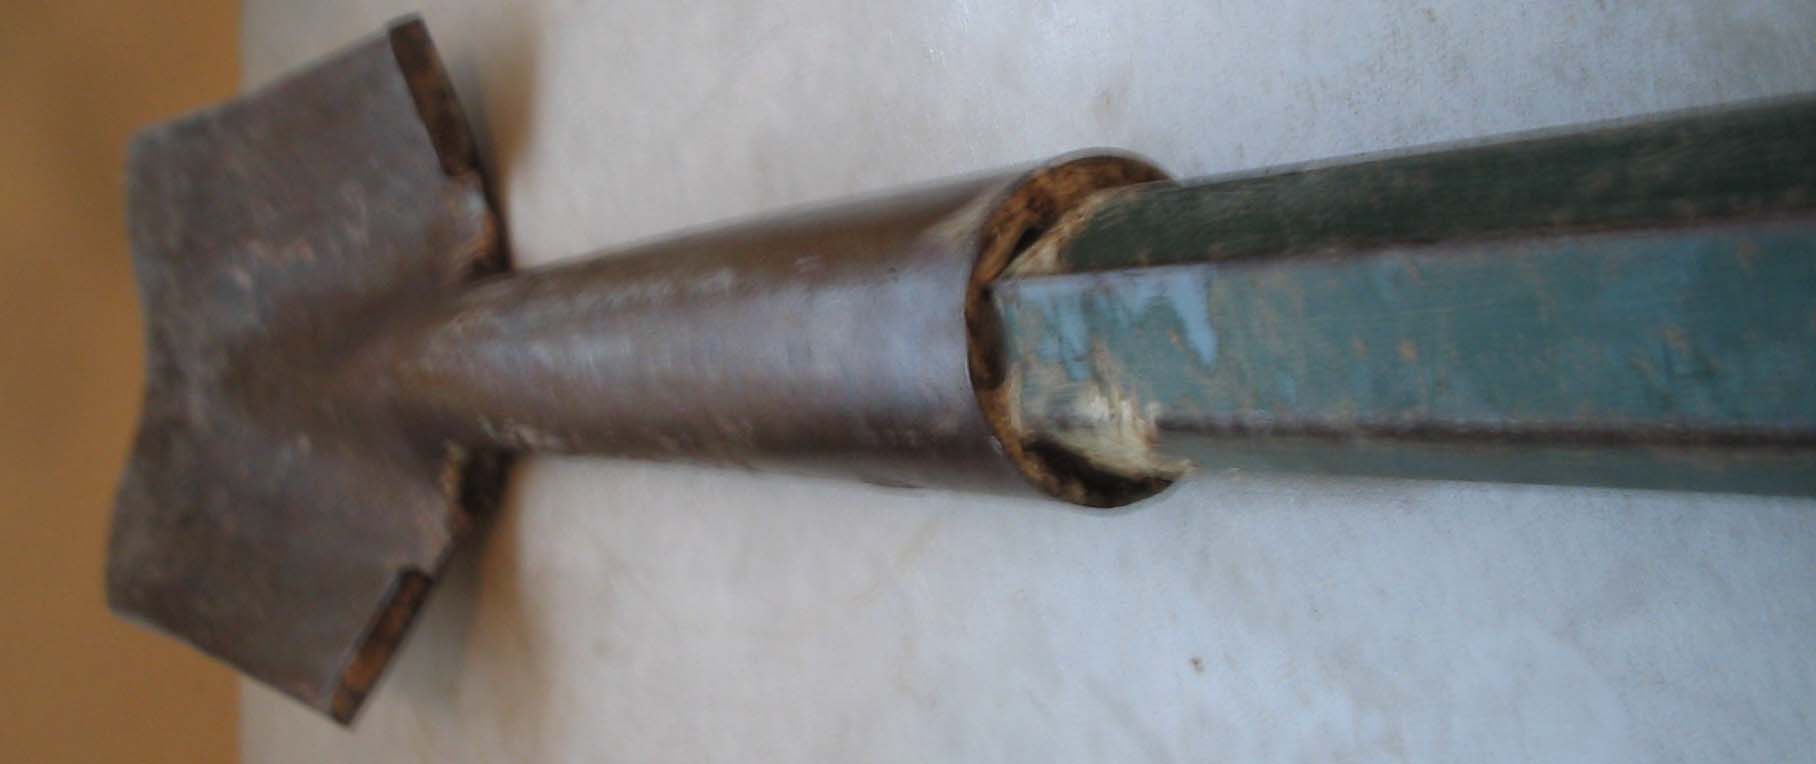
Pictured above is a modern telephone pole spoon sold by Peavy, and which comes in lengths up to 14' long. Peavy sells 12-foot posthole diggers as well. The term "Bertha" is derived from the large-caliber German artillery gun "Big Bertha," which was an enormous siege gun (at the time the world's largest and most powerful) produced by the Krupp firm in Germany shortly after the end of the Russo-Japanese War of 1904. It was first used to demolish the fortress towns of Liege and Namur in August 1914, and then used to reduce other enemy strong-holds as the need arose. The name is a somewhat unflattering reference to Bertha Krupp, the wife of Gustav Krupp, owner of the Krupp factory which made the gun. Like the siege gun from which it derives its name, the American-made "Bertha" digging spoon is also used to demolish fortified strongholds -- those of groundhogs, fox, raccoon, possum and badger that have denned in heavy or frozen soil, or under rock, sandstone, marl, shale, slate, tree roots, or construction rubble. To the best of my knowledge, no one in the U.S. sells a ready-made "Bertha" or "spoon" for terrier work -- those who own them have made their own, or had them made for them at local welding shops. My own Bertha was made out of a heavy-duty 6 foot digging bar that I already had in the garage -- a tool left over from a bit of excavation work at the back of my property. This heavy-duty hex bar was bought at Home Depot and has a very sharp point on one end, with a flared cutting head at the other.
For the shovel-end for my Bertha, I used what was at hand -- a trenching spade head found on another "spare" tool I already had in the garage. I began construction of my Bertha by cutting off the wooden handle of the trenching spade and drilling out the wood until I got to a pure metal socket. Next I dry-tested the fit of the bar by putting the pointed end of the bar into the socket of the shovel. It fit quite well -- very tight at the base (thanks to the sharp point on the bar) and a bit loose at the throat of the spade socket. The bar made a solid "metal-to-metal" contact at the base of the spade socket, with the very tip of the point going all the way through the socket. Excellent! Instead of welding, I decided to epoxy the bar into the shovel socket using PC-11, which is a very strong epoxy you can get at Home Depot. PC-7 is the same product, but PC-11 is the marine version, and I already had a canister of that in the garage so that's what I used. Mixed correctly, PC-7 and PC-11 are as thick as tar and take about 24 hours or more to fully dry, but the strength is truly phenomenal. This is the most amazing epoxy I know of. From past experience, I
have found that a clean metal-to-metal bond with PC-7 or
PC-11 is almost unbreakable, and since the bar was
directly socketed into the spade head, the epoxy only had
to attach the shovel blade to the bar, not hold up
to the full load of the direct impacts made when digging.
Because the socket was long and well-shaped for gluing,
the epoxy had a lot of surface area with which to
accomplish its mission.
The short story is that the epoxy bond has worked very well, and despite considerable abuse, has remained 100% sound. About six months after assembling my Bertha, I cut down the trenching spade head to eliminate flex in the blade. The trenching spade blade had done well for slicing through wet clay, but when working frozen ground and very hard sand, dirt and loose slate, I found that the long thin blade of the unaltered trenching spade flexed too much. Getting rid of the flex was as simple as putting a metal-cutting wheel into a Skil-Saw, and cutting the blade back as shown in the diagram below. After cutting down the blade, I ground a new bevel on it, and then took a file and a blade sharpener to complete the new edge. It's still more than a bit rough, but quite serviceable nonetheless.
The result is, to my
mind, a very satisfactory Bertha. It cuts well and is so
heavy that simply raising and dropping the bar
accomplishes most of the hard work.
The completed Bertha is about 6 and half feet long, and with a lot of weight behind it. This is a "truck tool" that is brought to a dig only when absolutely needed, but when it gets to the dig site, there is no question that it can do the job, and do so without complaint or worry.
Other folks have made other spoons, of course, varying the construction somewhat. Mike Bilbo, for example, made the spoon pictured above from a pneumatic hammer clay spade made by Bosch and sold at Home Depot. To this very impressive front end he welded an equally impressive commercial mining drill rod which is 1-1/8" hex steel and very stiff. The finished product weighs about 25 pounds and can really do the business. Mike also has an instruction manual for this tool -- see license plate.
|

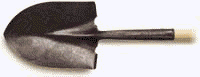 Round Point Shovel
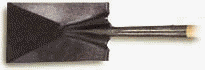 Garden Spade
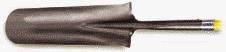 Drain Spade
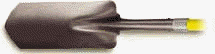 Trenching Spade